Beam Robotics
I recently decided to get into BEAM robotics as a fun way to do electronics that was different from my daily job of embedded programming. Solarbotics used to be the main site for BEAM robotics from what I can tell, and they still have an old website up that contains many useful resources on circuits, designs, and just general ideas. Hackaday also recently posted about a Dragonfly beam robot project that someone made. One of the fun parts about BEAM robotics is that the heyday appears to have been in the late 90's to mid 2000's, so resources about it are like walking into a time machine. Plus, for those of us who grew up in that era there is a sense of nostalgia when viewing pages someone clearly wrote themselves.
This is going to be the first of my posts on BEAM robotics as I explore these designs. Mainly my focus lately has been to create a more efficient charging circuit, with the goal of being able to (very slowly) charge a beam robot in regular indoor lighting. Not sure it's possible, but it would be amazing if it was.
This is my first robot, which I've called Iky. The circuit is based off Ken Huntington's Micropower circuit. I've simplified the circuit by removing the need to have a second 2n3904+2x3904 stage for driving the motor and instead am using a single 2n7000 to drive both motor and to provide hysteresis. This works well since the 2n3906 is a current controlled device while the 2n7000 is voltage controlled, which reduces interference that I think was the reason for the extra complication in Ken's circuit. It's probably also possible to make the circuit completely with FETs, but I'm going to leave that for later.

Iky the frightful
To test the performance I used the circuit shown below:

Improved Micropower circuit
| Supply Voltage (V) | Current (nA) |
| 3.072 | 92.0 |
| 3.28 | 230.7 |
| 3.38 | 317 |
| 3.485 | 423.1 |
| 3.586 | 538 |
| 3.687 | 785 |
| 3.74 | 1380 |
| tripped | tripped |
Current vs Applied Voltage
The table above shows that we have a relatively sharp transition point right around 3.7-3.8 V. The granularity here isn't great as I do not have the ability easily change my power supply voltage, so I'm using large steps. Future testing will include automating this measurement so that I can see how "sharp" the trigger is.
I was also able to monitor the trigger point and lowest discharge level of the circuit:
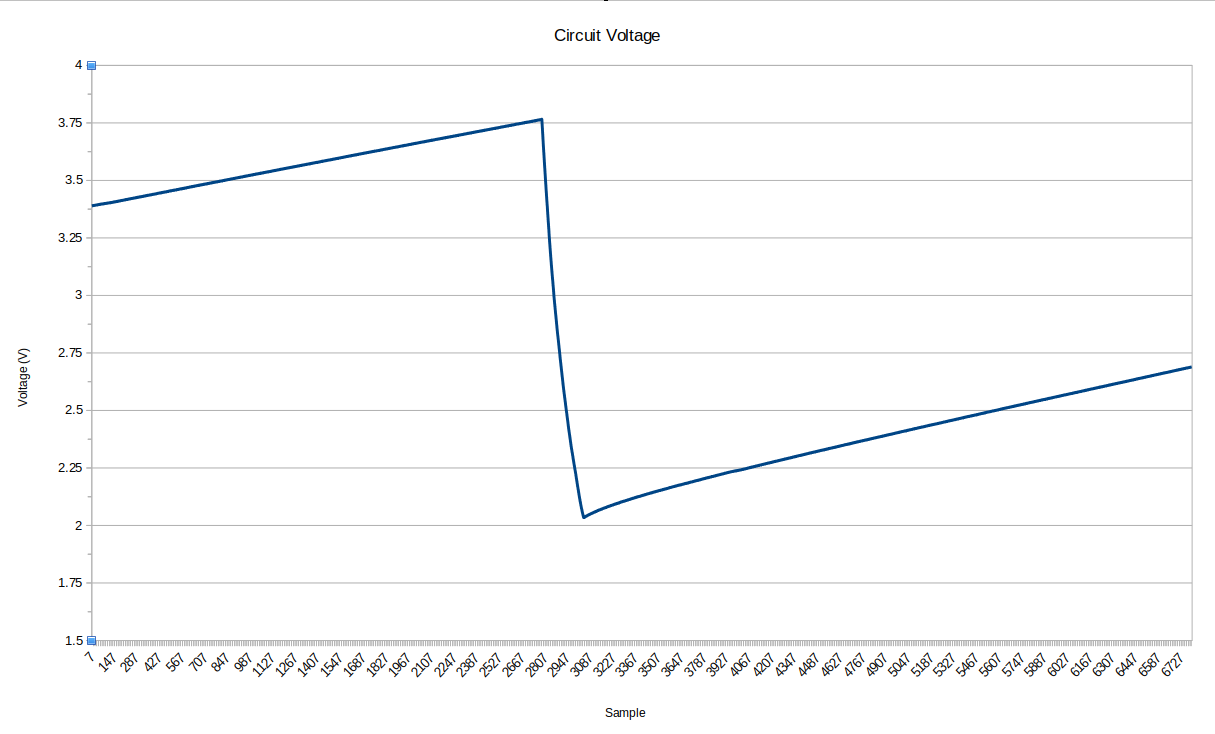
Which shows that the circuit triggered at around 3.75V and would discharge until around 2V. With a 0.01F capacitor storing energy, this means that we store E=1/2CV^2 J or 0.0703J at full charge (3.75V) and have only 0.02J left when discharging stops. This works out to a rather good %72 energy extraction from the circuit.
The main problem I'm left with in this circuit is that when close to the trigger point the consumption increases to >1 uA, which can cause the solar cell voltage to droop when not in direct sunlight, thereby stopping the trigger from activating. I believe this is because the diodes used as a voltage reference / trigger doesn't have a sharp enough "knee" when going from low conduction to high conduction as the capacitor voltage reaches the combined Vf of the diodes. This transition means that the 2n3906's base current isn't sufficient to pull the gate of the 2n7000 high and start the circuit. One thing that could help is having "sharper" transition than the current 1N4148 I'm using in the circuit.
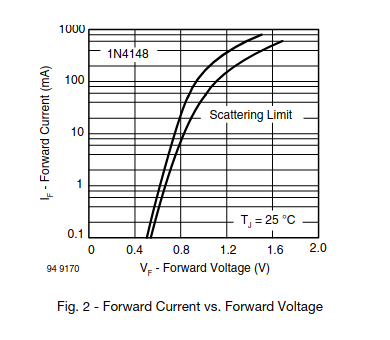
1n4148 Forward Voltage vs Forward Current
I've also attempted to use a darlington pair of PNP transistors (just using two 2n3906's) to improve the gain, but this actually made the transition worse and appeared to consume more current than the previous circuit.
Likely there is also some current lost in the capacitor itself as a parasitic resistance, so further investigation will be required to determine what factors affect the minimum usable current for a BEAM robot. Some other improvements could be in using FETs with lower Vgs requirements, so that the "on-time" of the circuit is better.
That all said I'm very happy with how well it performs for how simple the circuit is.
Tags: Circuits